Fiberglass is your friend and is amazingly easy to work with...
since there are 9,132,123 threads asking how to fix it, and 0 threads showing you how to--- here it is...
***IF YOU USE BONDO, I WILL FUCKING KILL YOU*** that shit dries really hard, dosent flex and causes other cracks. So if u use it, fuck yourself.
Step 1. Gather all your materials... they are...
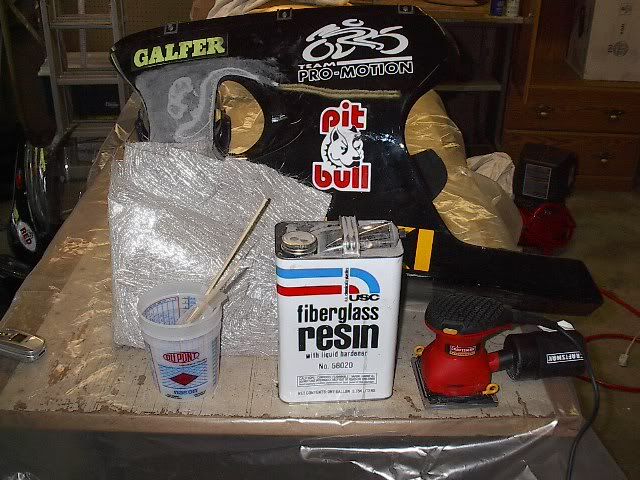
1. Fooked up body work
2. US Chemicals Fiberglass Resin Number 58020 and hardener
3. Fiberglass matt-- NOT THAT SHIT ASS CHEESE CLOTH, but matting--- it looks almost like insulation in your attic, but its not--
4. Graduated Mixing Cups
5. Rubber gloves
6. Mixing sticks
7. Sander
8 Sand paper --- 40,60, or 80 grit and 150 grit
Everything can be found at 95% of auto repair stores, but i happened to get mine from a place that specializes in auto-body since i knew they'd have the graduated mixing cups and the appropriate resin.
Step 2. Prep the body work...
With 40, 60, or 80 grit paper, sand the einter damaged area to scuff up, remove any burrs, etc-- sand an area atleast 3 inches bigger than the damaged area... i did the whole piece of body work so that painting will be easier, but thats up to you... You dont have to remove all the paint... Rule of thumb-- if u can feel it, u'll be able to see it in the paint, so do your best to remove all sticker glue, dirt, crud, etc... once again u dont have to go the whole way thru the paint, but smooth it all out...
Wipe off excess dust from sanding with a damp cloth...
Step 3. Cut your repair pieces...
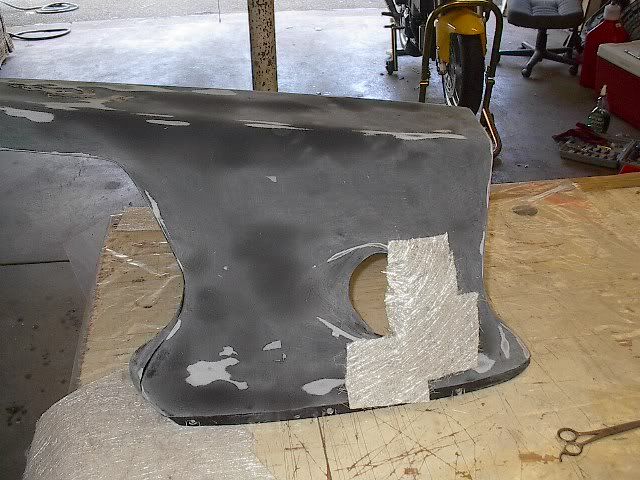
Make sure the pieces of fiberglass you cut are LARGER than the damaged area... you may even want to cut a piece for the back of the bodywork if there are any holes or super thin areas...
Lay them aside.
Step 4. Mix the resin...
***PUT YOUR RUBBER GLOVES ON***
***FOLLOW THE DIRECTIONS ON THE SIDE OF THE CAN***
***MIX ONLY WHAT YOU WILL USE, DONT MAKE EXTRA***
you'll have about 5-7 minutes to get this shit on once you add the hardener...
Step 5. The Hard part...
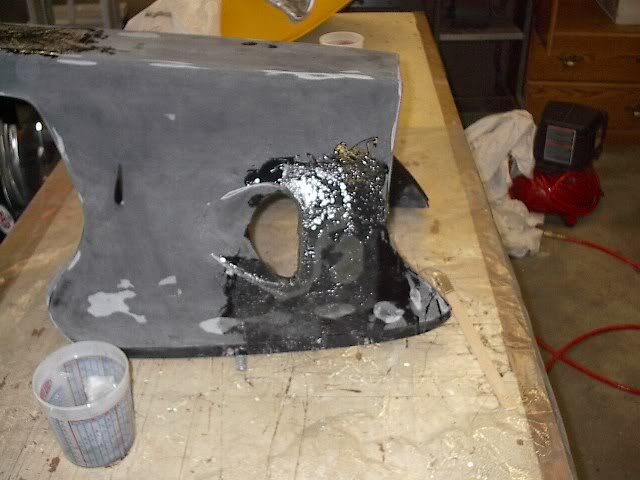
Now that the resin is mixed, cover the entire work area with resin...
Now, get your fiberglass pieces u set aside and an soak them with resin... apply them to the body work... smash the shit as flat as u can so as to get all the air bubbles out... work it with your fingers to get all gaps in the fiberglass to push together.... Take the left over resin and cover the enitre work area...
Tip: U dont have to do this but it helps... take a piece of plastic sandwich wrap and place it over the fiberglass/resin combo.... u can use it to smooth out the area and remove air bubbles without damaging the fiberglass matting or making a mess... u can use your hands or a rubber squeege/rubber puddy knife....wait a minute or two, then peel off the plastic slowly...
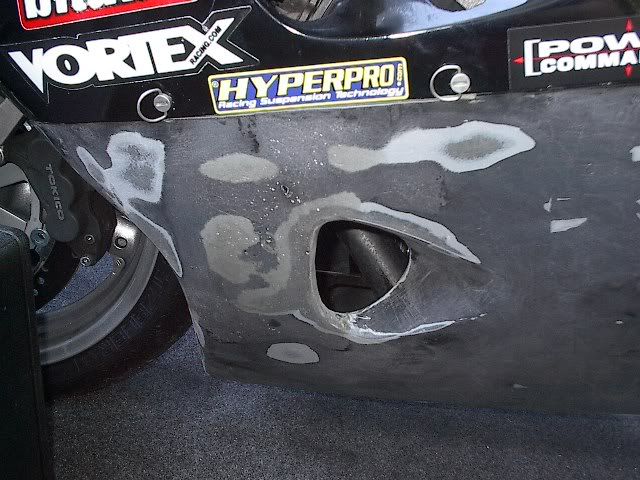
Step 6. ***WAIT 18-24 HOURS***
the resin/fiberglass will harden, some of the resin that isnt on fiberglass may still be sticky-- you can either sand it off, or use a bit of acetone to rub it off the hard to sand or unprepped areas.
Step 7. More sanding....

With the 40, 60, or 80 grip paper sand that sucker smooth.... This is gonna take a while, but the results are well worth it... blend the edges of the fiberglass to the body work, no bumps or seams... once again, if u can feel it with your hand u can see it when u paint... sand and sand and sand some more....
Once its nice a smooth, prep for paint. Take the 150 grit paper and do one final all over sanding... wipe off dust and sanding crap with damp cloth again....
and BADA BING, you're done.... for now...
mount and ride...
or....
prime and paint--- BITCHES!
and GOOOOOOD LUCK!